This blog follows my construction of an above ground pool and deck. It may be handy for anyone interested in erecting their own pool someday. I have done extensive research before undertaking this project.
I would like to give credit to the website Trouble Free Pool (http://www.troublefreepool.com). It is probably the best website for those interested in everything related to pools and I spent a lot of time there.
First, here are some pictures of the completed pool and deck:


There are many types and sizes of above ground pools available, from rather inexpensive kits found in stores like Walmart to more expensive packages from pool companies. I decided to purchase a quality pool designed to last many years. You can either go with a freshwater or saltwater setup.
The main difference is that a saltwater pool must have a saltwater system to generate chlorine, where you manually add chlorine to a freshwater pool. From my research people prefer the feel of saltwater pools. Saltwater pools seem to retain their chemical balances better as well. I plan to add borates to the pool for even better water control and make the water feel softer.
The main difference is that a saltwater pool must have a saltwater system to generate chlorine, where you manually add chlorine to a freshwater pool. From my research people prefer the feel of saltwater pools. Saltwater pools seem to retain their chemical balances better as well. I plan to add borates to the pool for even better water control and make the water feel softer.
With saltwater, a normal steel pool is in danger of corroding. For this reason, I decided to go with a resin pool. Resin pools still have steel walls, but have resin caps and tracks to last longer. They are more expensive, though.
Shape and size are the next decisions to make. Round pools seem to have fewer problems than oval, so I decided on an 18 foot round. 24 foot round pools are by far the most common size, but with adding a deck, my yard was just too small. I did go with the highest wall pool they make, which is 54”.
So, where to buy? We’ll, after much research and price comparison, I decided to purchase mine from the Pool Factory. Note, this is not a paid endorsement, they just seem to have the best price for what I wanted. Also note that I did not purchase my pump and filter through them, as I could get a better deal on Amazon.
This is the purchase I made from the Pool Factory:
18'x54" Saltwater 8000 Round Pool
Hayward Thru-Wall Skimmer & Return Fitting (included)
18' Round Overlap Caribbean Liner - 25 Gauge
18' Round Peel N' Stick Foam Pool Cove
18' Round Peel N' Stick Foam Pool Cove
18' Round Armor Shield Liner Floor Pad
18' Round Pool Wall Foam
18' Round Ultimate Guard Winter Cover
Aqualuminator Above Ground Pool Light 98605000
Cocktail Tray for Above Ground Pools
This came to a total of around $2,300. There are some optional items I ordered, so let me touch on some of these.
I need to talk about the construction of the base for a pool. After leveling your yard, it is common to purchase sand to lay down for the base floor. Sand is used for two purposes. First, it provides a soft floor to stand on. Second, you must build up a slanted cove around the pool interior to keep the water from pushing out the bottom of the pool wall. The problem with sand is the cost, effort to move it, and risk it may wash away with time.
I need to talk about the construction of the base for a pool. After leveling your yard, it is common to purchase sand to lay down for the base floor. Sand is used for two purposes. First, it provides a soft floor to stand on. Second, you must build up a slanted cove around the pool interior to keep the water from pushing out the bottom of the pool wall. The problem with sand is the cost, effort to move it, and risk it may wash away with time.
For this reason I decided on an alternate method. Rather than sand, I will use R-5 Tongue and Groove Insulation Sheathing panels to form the floor. I also purchased a Foam Pool Cove, which eliminates the risk of the cove washing away. I upgraded to a 25 gauge liner from a 20 gauge for added strength. The Pool Wall Foam is optional, some like it and some think it does little. I picked it up to give a little cushion between the liner and pool walls.
The Aqualuminator Above Ground Pool Light is an optional fitting that replaces the return assembly. The most important purchase is the Cocktail Tray, which goes without saying.
With the main pool purchase complete, I went on Amazon for rest of the equipment I needed. Note there are options out there, but from my research, these are what I decided on. It totaled around $550.00.
Confer Curve Base Steps for Above Ground Swimming Pools
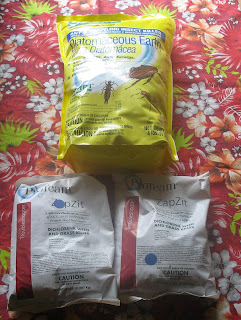
Safer Brand 51702 Diatomaceous
Teflon Magic Lube for Gaskets
Intex Pool Maintenance Kit - Deluxe Edition
Intex Krystal Clear Sand Filter Pump, 2800 GPH
Intex Krystal Clear Sand Filter Pump, 2800 GPH
Intex 120V Krystal Clear Saltwater System CG-28667
Pool sprayer
I hate those cheap little steps you get with most pool kits, and being I am building a deck, I decided to get a nice set of pool stairs. The Diatomaceous is an insecticide powder I plan to lay down on the base.
At this point, it is time to get my hands dirty and actually map out where the pool will go. Being it is an 18 foot diameter pool, I measured out the best location and then drove a stake in the middle of where I will mark a circle. Note that you want to make the actual circle a foot or so larger, so you have room to work. Tie some twine or thin rope to the stake and make it half the diameter, and grab some spray paint to mark the circle. Now you know what you have to clear.
Here is the yard before clearing the space for the pool.


Here is the yard before clearing the space for the pool.


Lucky me, there used to be a tree where I am putting the pool, which means lots and lots of roots to clear. The yard is fairly level, but I will still need to dig down almost a foot on one end.
The pool came today, and here it will sit for a while.

The pool came today, and here it will sit for a while.

Here I am clearing my nice lawn.


Now, the excavation begins. It seems with every couple inches, there is another root! And I do not just mean little ones, but some the size of small trees. This will definitely add some time onto my excavation estimation.


More leveling.


Here the connecting panel had been attached where the skimmer and return will be fitted. Some pools have this built into the pool wall, but on this one there was a seporate section. One note, I put this on backward. I found out later the aluminum side should face inward, but there is no way I am taking this mother apart again.


Turns out the 1 1/2 inch valve to the pool sprayer was very difficult to turn, so I bolted on a longer handle for additional leverage. This makes it very much easier.


Balusters attached.

Added some non-skid pads to the steps.


Red mulch added.


The top sod has been removed.


Yeah, this might take a while.

Here I am leveling the ground using string and a hanging level.


An idea of what I dug out to level the ground.

At this point, the ground shows level.


Time to lay down the paver stones. These will go under the main upright supports. I laid out the bottom track to mark where the stones will go. I also built a small retaining wall to hold off erosion.


A quick test for the deck layout.

More leveling.


After a rain, it looks like the back side is still too low. I dug out the front a little more and added some dirt back to the rear.

I laid down the 4x8 insulation panels and cut them to make the floor, then moved it out of the way.
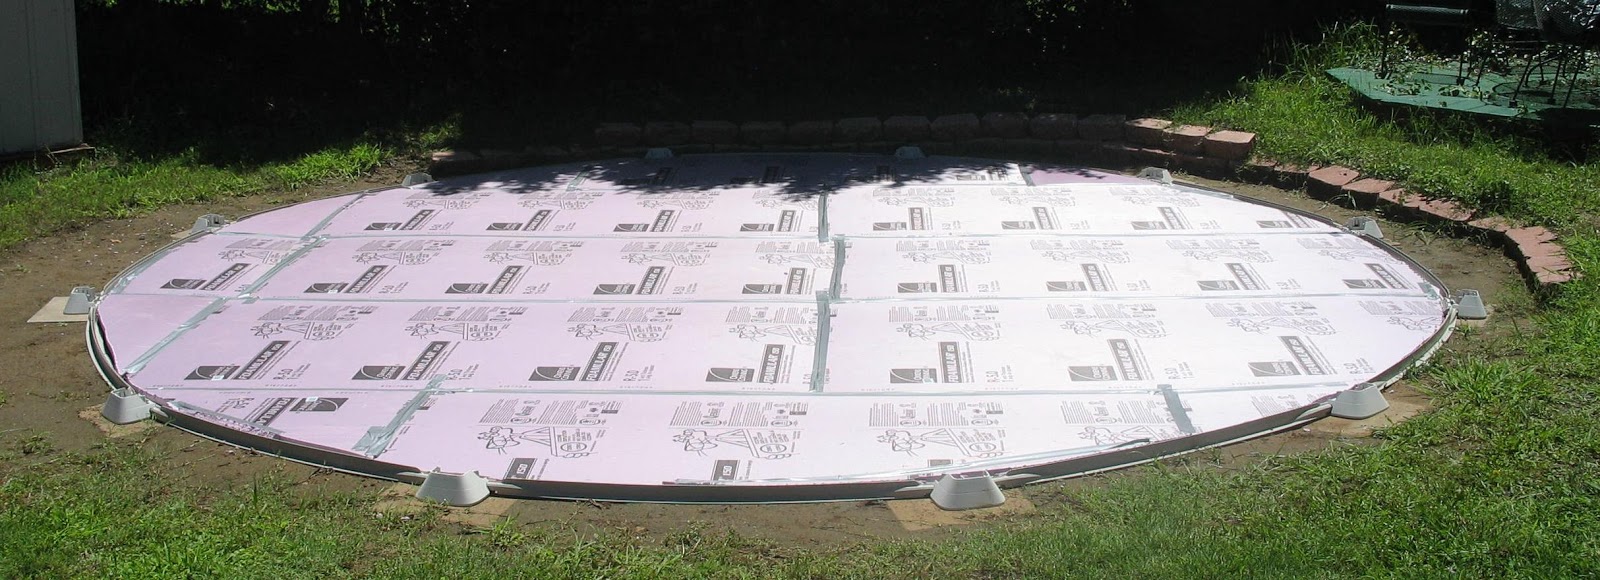
Measuring to make sure the circle is even around.

No, these are not for my KKK rally. That is on Tuesday. These are some quick braces I made to help hold the pool walls up. I hope they will work with the deck blocks I have.

Here is a home I built for the pump. Many people just sit the pump outside, but I wanted to protect it a little from the elements.


After about a month of rain, I decided it was time to go for it and get the pool erected. This had to be a quick process. I needed to get the pool up and halfway filled for stability before moving to the deck project.
Here is the wall being rolled out and fitted in the bottom tracks. This thing is steel and heavy, especially for one person to move around.


You can see my homemade braces holding the pool sides up with C-clamps.

Here the connecting panel had been attached where the skimmer and return will be fitted. Some pools have this built into the pool wall, but on this one there was a seporate section. One note, I put this on backward. I found out later the aluminum side should face inward, but there is no way I am taking this mother apart again.

On the pool floor I am going to sprinkle Diatomaceous Earth and ProTeam ZapZit Weed and Grass Killer. This is to control any weed growth under the pool and help control insects. This is an optional step, but from my reseach many pool builders have recommended using these.

Oh look, more f-ing rain! This is a bit of a mud pit right now. Where are a couple of girls in bikinis when you need them?

The pool floor is in.

Side foam and foam cove is in. I used spray adhesive and duct tape for the side foam.

Floor pad is in.

And the liner is in Lay the liner in the sun for a couple hours to soften up before installing. You can see the wall strips used to hold the liner in place throughout the build. They help keep the walls steady.

Braces removed and the rest of the pool has been erected.

A point of note, I tied towels on the feet of this ladder to help protect the liner.

Time to fill the pool halfway. This might take a while.

Let's build a deck! I am using deck blocks rather than digging out holes for the 4x4x8 braces. The deck is not considered a permanent structure when building it on blocks like this, and thus will not affect your property taxes. The same goes for the above ground pool, as opposed to an inground one.
I needed to get the deck framed because the electrical needs to be installed before I can get the pool completely filled. The PCV and electrical box will attach to the deck.
Here is a test fit of the size. It will come out 8 feet from the pool, and be 16x16 feet on the sides. Worked out nice, as it will minimize lumber waste by using 8 foot boards.

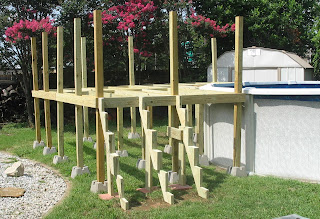
Vertical braces are up made of 4x4x8's, and the floor braces are in made of 2x6x8'. Everything is screwed in with 3 inch screws. Stair Stringers are also in place.


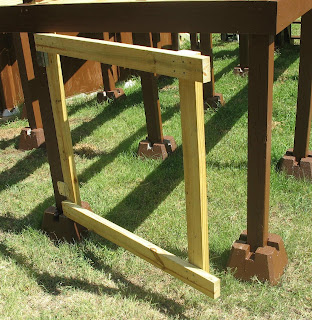
Bracing and building the steps.


Steps and bottom posts are painted. I have also constructed using 2x4x8's a framework around the pool that will be used later.

Working on the electrical. There is a 2-20 Amp Backyard Outlet with GFCI Receptacles box mounted near where the pump will go. I ran PVC under the deck, and then trenched out the rest of the length to run the PVC into the Tikki room.


Here is the finished electrical inside the Tikki room. This way I can unplug the electrical to the outside receptical when not in use.

Here is a door I build that will allow me to store the pool supplies under the deck.


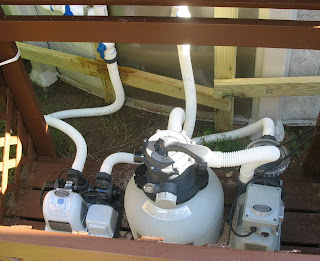
Completed the plumbing. I installed PCV and valves so the water can be turned off without draining the pool if the pumps need repair. Also, I put a bypass in so I can switch the water flow from the main return to the pool sprayer.

Turns out the 1 1/2 inch valve to the pool sprayer was very difficult to turn, so I bolted on a longer handle for additional leverage. This makes it very much easier.

The sand pump and saltwater generator.

Stairs are in. Now I can fill the pool the rest of the way and get the pump going to clear up this water.

Now that the pump is going, I can finish planking the deck.


Pool sprayer test. The sack underneath the sprayer is full of Cyanuric Acid to raise the CYA level. One of the many water tests you will end up monitoring.

Building and painting the rails and deck door.


Added some non-skid pads to the steps.

Deck painted.

Build a little path to the deck from the Tikki room. This was a lot more work than I envisioned. Moved about 8 wheelbarrols worth of dirt from here.

I went through many, many ideas on how I wanted to decorate the pool. I never liked the look of steel pool walls. I came across this Ivy canvas roll used on privacy fence, and thought I would give it a try. I attached the ivy to the wood framework with staples and zip ties, and used small bungee cords to attach around the rim.

Added edging.

Red mulch added.

I attached lattice to the sides, then the ivy. Originally I was just going to use lattice, but then thought to surround everything with the ivy.

Added a latch on the deck door.

Just about done now with the privacy canvas added. It is made of thick mesh to allow the wind to pass through.


And that's all there was to it!